
How to Load Photoshop Shortcuts in Affinity: 7 Simple Steps
Switching from Adobe Photoshop to Affinity Photo can be challenging, especially if you’ve relied on Photoshop’s keyboard shortcuts for years. The great news is that Affinity Photo allows you to import and customize Photoshop shortcuts, making this transition far smoother. In this detailed guide, we’ll take you through how to load Photoshop shortcuts in Affinity in 7 simple steps, helping you maintain your workflow efficiency without the hassle of relearning new shortcuts.
Why Switch to Affinity Photo?
Before diving into how to import Photoshop shortcuts into Affinity Photo, it’s essential to understand why many professionals are making the switch. Affinity Photo is known for its affordability and robust set of features that compete head-to-head with Adobe Photoshop. Here are a few reasons why you might consider switching:
- One-Time Purchase: Unlike Adobe’s subscription model, Affinity Photo offers a one-time purchase, making it more cost-effective in the long run.
- Advanced Editing Features: It includes non-destructive editing, live filters, and built-in RAW editing.
- Cross-Platform Compatibility: Affinity Photo is available on both Windows and Mac, and it also has a powerful iPad version, making it a versatile choice for designers on the go.
Now that we know why Affinity Photo is worth considering, let’s get into how to seamlessly bring your Photoshop shortcuts into this new environment.
Step 1: Download and Install Affinity Photo
If you haven’t already installed Affinity Photo, this is your first step. Here’s how you can get started:
- Visit the official Affinity Photo website.
- Click on Buy Now to purchase the software or opt for the Free Trial to explore its features.
- Download the software for your operating system—Windows or Mac.
- Run the installer and follow the on-screen instructions to complete the installation.
Once installed, open Affinity Photo and take a moment to familiarize yourself with its layout and features. Understanding its interface will help you navigate the process of importing Photoshop shortcuts smoothly.
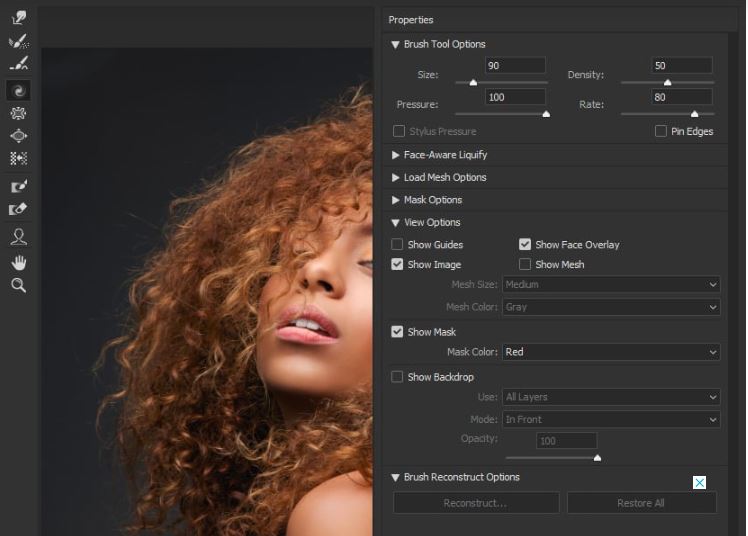
Step 2: Open Keyboard Shortcuts Settings in Affinity Photo
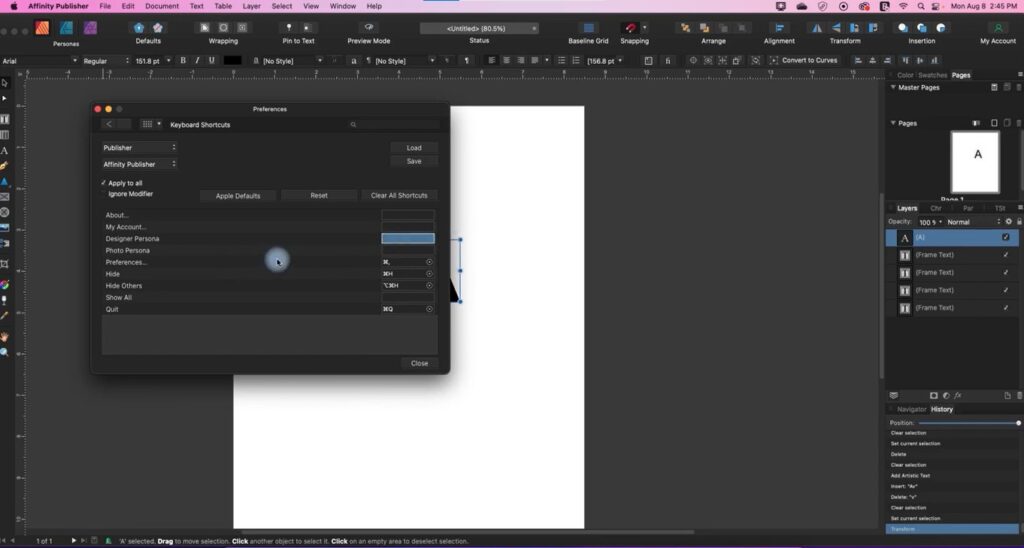
After installing Affinity Photo, the next step is to access the keyboard shortcuts settings to begin the customization process:
- Open Affinity Photo on your computer.
- Navigate to the top menu and click Edit (on Windows) or Affinity Photo (on Mac).
- From the dropdown menu, select Preferences.
- In the Preferences window, click on the Keyboard Shortcuts tab.
This tab is where you will manage all keyboard shortcuts in Affinity Photo, whether you’re looking to create new ones or import existing shortcuts from Photoshop.
Step 3: Import Photoshop Shortcuts into Affinity Photo
Affinity Photo understands that many users are transitioning from Photoshop and provides an option to use Photoshop shortcuts directly. Here’s how to load Photoshop shortcuts in Affinity:
- In the Keyboard Shortcuts tab, locate the Presets section.
- Click on the Presets dropdown menu.
- Choose Photoshop from the list of available preset options.
Once selected, Affinity Photo will automatically apply the Photoshop shortcut set, enabling you to use the same key commands you’re familiar with. This simple step saves time and helps maintain a consistent workflow.
Step 4: Customize Your Shortcuts for Personal Efficiency
While importing Photoshop shortcuts is a huge time-saver, you may find that some shortcuts do not map perfectly or that you want to tweak them for even better efficiency. Here’s how you can customize them:
- While in the Keyboard Shortcuts tab, browse through various categories like File, Edit, Layer, View, and others.
- Click on a category to see the list of commands and their associated shortcuts.
- To change a shortcut, click on the shortcut field next to a command and press the new key combination you prefer.
- Ensure that the new shortcuts do not conflict with existing ones by checking for any red warning alerts.
Customizing shortcuts allows you to set up a workspace tailored to your needs and habits, helping you work more efficiently in Affinity Photo.
Step 5: Save Your Customized Shortcuts for Future Use
After you’ve customized your shortcuts, it’s crucial to save them to avoid losing your settings:
- At the bottom of the Keyboard Shortcuts tab, click the Save As button.
- Enter a unique name for your preset (e.g., “Photoshop to Affinity Custom Shortcuts”).
- Click Save to finalize and store your customized settings.
Saving your shortcuts as a preset not only ensures you don’t lose your settings but also allows you to switch between different shortcut configurations effortlessly.
Step 6: Test Your Shortcuts to Ensure They Work Properly
With your Photoshop shortcuts imported and customized in Affinity Photo, it’s essential to test them to ensure they’re functioning as expected:
- Open a new document in Affinity Photo by using the shortcut Ctrl/Cmd + N.
- Try commonly used shortcuts like:
- Ctrl/Cmd + Z for undo.
- Ctrl/Cmd + S for save.
- B for the brush tool.
- V for the move tool.
- Ctrl/Cmd + T for free transform.
If any shortcuts don’t perform as expected, revisit the Keyboard Shortcuts tab to adjust and correct them.
Step 7: Back Up Your Customized Shortcuts
To avoid losing your custom shortcut settings due to updates or resets, it’s good practice to back them up. Here’s how:
- In the Keyboard Shortcuts tab, click the Export button.
- Choose a destination on your computer to save the backup file.
- Click Save to create a backup of your shortcuts.
Having a backup means you can easily restore your settings if needed, preventing the loss of time and productivity.
Tips to Enhance Your Workflow in Affinity Photo
With Photoshop shortcuts loaded, here are additional tips to maximize your productivity in Affinity Photo:
- Get Comfortable with Personas: Affinity Photo introduces a unique concept called Personas, which are different workspaces designed for specific tasks. The most notable ones are:
- Photo Persona: For standard photo editing.
- Liquify Persona: For distortion and warping effects.
- Develop Persona: For RAW photo development.
- Export Persona: For managing and exporting files in various formats.
- Use Non-Destructive Editing: One of the standout features of Affinity Photo is its non-destructive editing. Unlike Photoshop, most edits in Affinity are non-destructive by default, meaning you can make changes without altering the original file. This allows more flexibility, especially in complex projects.
- Explore the Power of Live Filters: Live Filters in Affinity Photo work in real-time and remain fully editable after being applied. This feature provides more control over how your final image looks without losing any details.
- Leverage Affinity’s Batch Processing: For those who need to edit multiple files at once, Affinity Photo offers a powerful batch processing feature that automates repetitive tasks. This is perfect for photographers or designers who need to apply the same settings across numerous files.
- Create and Save Macros: Macros in Affinity Photo are similar to Photoshop’s actions. They allow you to record a series of edits or effects and apply them with a single click, saving time on repetitive tasks.
- Customizing the Interface: Affinity Photo’s interface is highly customizable. You can rearrange panels, toolbars, and menus to fit your workflow better. This helps in keeping frequently used tools within easy reach, enhancing your overall productivity.
- Utilize the Snap and Alignment Tools: Precise alignment is crucial in design. Affinity Photo provides robust snapping and alignment tools that ensure your layers and elements are perfectly aligned, providing a clean and professional look.
- Understand Affinity Photo’s Color Management: Affinity Photo offers advanced color management options that cater to both print and digital formats. This ensures that the colors you see on your screen are what you get in print, crucial for professional designers and photographers.
- Use the Export Persona for Efficient Exporting: The Export Persona is a powerful tool that allows you to manage slices, create presets, and export multiple versions of your design simultaneously. This feature is especially useful for web designers who need assets in various sizes and formats.
Common Issues When Importing Photoshop Shortcuts and How to Fix Them
When learning how to load Photoshop shortcuts in Affinity, some users encounter issues where not all shortcuts transfer perfectly. Here are some common issues and how to address them:
- Conflicting Shortcuts: Some shortcuts may conflict with Affinity Photo’s native shortcuts. To fix this, customize these shortcuts to avoid conflicts.
- Missing Shortcuts: Occasionally, some shortcuts don’t carry over. If this happens, manually add the missing shortcuts using the steps outlined in Step 4.
- Performance Lag: A few users report minor lag when using imported shortcuts, especially on lower-end machines. Optimize performance by adjusting Affinity Photo’s performance settings under Edit > Preferences > Performance.
- Resetting Shortcuts to Default: If you wish to reset the shortcuts to Affinity’s default, go to the Keyboard Shortcuts tab, click on Reset, and confirm your choice.
Affinity Keyboard Shortcuts: Maximize Your Productivity
Understanding and utilizing Affinity keyboard shortcuts can transform your workflow in Affinity Designer, Photo, or Publisher. These shortcuts provide a faster way to execute commands, navigate tools, and perform edits without ever leaving your keyboard.
Why Use Affinity Keyboard Shortcuts?
- Enhance Speed and Efficiency: Skip the menus and instantly execute tasks, saving time on every project.
- Stay Focused: Maintain your creative momentum by minimizing interruptions caused by mouse clicks and menu navigation.
- Personalize Your Workflow: Affinity applications allow you to customize keyboard shortcuts to match your unique working style.
Most Useful Affinity Keyboard Shortcuts
| Function | Shortcut (Windows) | Shortcut (Mac) |
|---|---|---|
| Zoom In/Out | Ctrl + + / - | Cmd + + / - |
| Select All | Ctrl + A | Cmd + A |
| Deselect All | Ctrl + D | Cmd + D |
| Copy/Paste | Ctrl + C / Ctrl + V | Cmd + C / Cmd + V |
| Undo/Redo | Ctrl + Z / Ctrl + Y | Cmd + Z / Cmd + Shift + Z |
Mastering these shortcuts can help you become more efficient, improve your focus, and enhance your creative process. Start using these shortcuts today to get the most out of Affinity software!
Make Affinity Photo look like Photoshop
Transforming Affinity Photo to look like Photoshop is a great way to enjoy familiar features without the hefty subscription. For designers who are used to Photoshop, adjusting Affinity Photo’s interface can help ease the learning curve. Here’s how you can make Affinity Photo resemble Photoshop for a smoother experience:
- Customize the Toolbar: Rearrange the tools to match Photoshop’s layout, making it easier to find what you need and feel right at home.
- Match Keyboard Shortcuts: Change Affinity Photo’s shortcuts to mirror Photoshop’s. This small tweak can make a big difference in your editing speed and comfort.
- Install Photoshop Brushes and Plugins: Affinity Photo allows you to use many Photoshop brushes and plugins. This means you can achieve the same effects and styles you’re familiar with.
- Set Up Panels and Color Profiles: Configure the panels and color settings to match Photoshop. This visual consistency helps in a quicker adaptation.
By following these tips, you can make Affinity Photo look and feel like Photoshop, enhancing your workflow and productivity without losing that familiar touch!
Where Are Photoshop Keyboard Shortcuts Stored?
If you’re using Photoshop regularly, knowing where the keyboard shortcuts are stored can help you customize your workflow and keep your settings safe. Photoshop keyboard shortcuts are saved in a .kys file format in specific system folders.
- Location on Your Computer:
- On Windows:
C:\Users\[Your Username]\AppData\Roaming\Adobe\Adobe Photoshop [Version]\Presets\Keyboard Shortcuts. - On Mac:
Users/[Your Username]/Library/Preferences/Adobe Photoshop [Version] Settings.
- On Windows:
- How to Customize Shortcuts:
You can easily modify or create your own shortcuts by going to Edit > Keyboard Shortcuts in Photoshop. Once saved, these changes are reflected in the.kysfile. - Backup and Transfer:
Want to transfer your shortcuts to another computer or save them for future use? Just copy the.kysfile to your desired location.
Knowing where Photoshop keyboard shortcuts are stored is useful for anyone looking to personalize their editing experience and keep their setup consistent across devices.
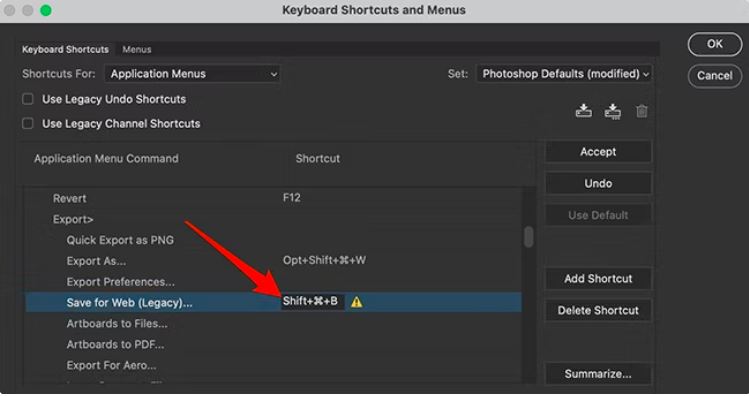
How to Activate Shortcuts in Photoshop?
Activating and customizing shortcuts in Adobe Photoshop is a game-changer for speeding up your workflow. Here’s a quick guide to help you activate shortcuts in Photoshop:
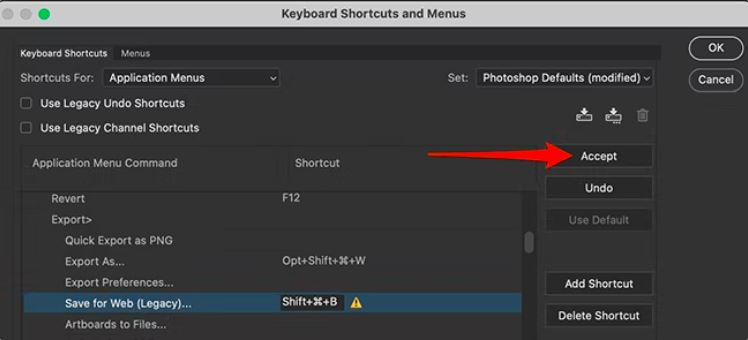
- Open Keyboard Shortcuts Settings: Navigate to Edit >Keyboard Shortcuts or use
Alt + Shift + Ctrl + K(Windows) orOption + Shift + Command + K(Mac). - Choose a Shortcut Set: Photoshop provides default shortcut sets, but you can also create your own by selecting New Set.
- Assign Shortcuts: Select a command or tool, click on the shortcut column, and type the desired key combination.
- Save Your Changes: Click Accept and then Save to apply your custom shortcuts. You can export them to use on another device as well.
Common Photoshop Shortcuts
| Action | Windows Shortcut | Mac Shortcut |
|---|---|---|
| Zoom In/Out | Ctrl + + / Ctrl + - | Command + + / Command + - |
| Undo | Ctrl + Z | Command + Z |
| Copy | Ctrl + C | Command + C |
| Paste | Ctrl + V | Command + V |
Pro Tip: Regularly customize and update your shortcuts to fit your workflow. It makes editing faster and more efficient!
Are Affinity Files Compatible with Photoshop?
If you’re wondering whether Affinity files are compatible with Photoshop, the short answer is no—Photoshop cannot directly open Affinity’s native file formats (.afdesign, .afphoto, .afpub). However, there are easy workarounds that let you work between these two popular design programs.
How to Work with Affinity Files in Photoshop:
- Export to PSD: Affinity Designer and Affinity Photo allow you to export your projects as Photoshop PSD files. This helps preserve most of your layers, adjustments, and effects, allowing you to continue editing in Photoshop.
- Other Export Formats: You can also export your Affinity files in formats like JPEG, PNG, TIFF, or SVG, all of which Photoshop supports.
- Potential Limitations: While exporting as PSD is effective, some advanced features like live filters or custom layer effects may not convert perfectly between the programs. Always double-check your design after export.
| Affinity File Format | Compatible with Photoshop? | Best Conversion Method |
|---|---|---|
| .afdesign (Designer) | No | Export as PSD |
| .afphoto (Photo) | No | Export as PSD |
| .afpub (Publisher) | No | Export as JPEG, PNG, etc. |
Conclusion
Now that you know how to load Photoshop shortcuts in Affinity, transitioning between these two powerful tools becomes straightforward. By importing, customizing, and saving your Photoshop shortcuts in Affinity Photo, you can maintain your familiar workflow while exploring new features that Affinity offers. This approach ensures a smooth switch, allowing you to work efficiently without missing a beat. Dive in, set up your shortcuts, and make the most of both worlds in your creative journey.
Frequently Asked Questions (FAQs)
Does Affinity Photo have filters like Photoshop?
Yes, Affinity Photo comes with a variety of filters similar to those in Photoshop. You’ll find common ones like blur, sharpen, noise reduction, and distortion effects. One standout feature in Affinity is the non-destructive live filters—these let you adjust images without permanently altering them. Whether you’re working on individual layers or the whole image, Affinity Photo offers powerful filtering options perfect for both beginners and professionals.
What plugins work with Affinity Photo?
Affinity Photo supports several popular third-party plugins, including some designed for Photoshop. While not every Photoshop plugin is compatible, plugins like Google’s Nik Collection, DxO PhotoLab, and various Topaz Labs plugins work seamlessly with Affinity. You can install them by going to Preferences > Photoshop Plugins in Affinity Photo’s settings. As Affinity continues to grow, support for more plugins is expanding, giving you even more creative options.
Where can keyboard shortcuts be edited in Photoshop?
Editing keyboard shortcuts in Photoshop is easy! Just go to Edit > Keyboard Shortcuts in the menu at the top. From there, you can customize the shortcuts for tools, commands, and actions to fit your workflow. Once you’re happy with your settings, you can save and even export them for use on another computer. Customizing shortcuts can help speed up your editing and make Photoshop feel more intuitive for your needs.
How do I use PSD mockups in Affinity Photo?
Using PSD mockups in Affinity Photo is simple! Just open the PSD file by going to File > Open and selecting your mockup. Most of the layers, including smart objects and adjustments, will transfer perfectly. You can edit and tweak the mockup as you would in Photoshop. While a few Photoshop-specific features, like certain layer styles, may not fully import, Affinity Photo has plenty of tools to help you get the same results.