Top 7+ Ways to Animate an Image Make 3D for Stunning Results
Why Should You Animate an Image in 3D for More Engaging Results?
Animating an image to make it 3D can bring your visuals to life and create a more engaging experience for your audience. By adding depth, movement, and realistic effects, 3D animation makes content more captivating and memorable. Here’s why you should animate an image to make it 3D:
- Boosts Engagement: 3D visuals instantly grab attention and keep viewers interested.
- Enhances Storytelling: Adds layers of depth and emotion, making stories more impactful.
- Offers Creative Freedom: Enables unique, eye-catching designs that stand out.
- Simplifies Complex Ideas: Makes difficult concepts easier to understand.
- Gives a Competitive Advantage: Helps your content shine in a crowded digital market, increasing visibility and engagement.
Top 7+ Ways to Animate an Image Make 3D for Stunning Results
Animating images and turning them into 3D visuals can greatly enhance their appeal, making them more engaging and dynamic. If you want to animate an image make 3D effects, and elevate your content, there are several creative methods to explore. This guide covers twelve effective ways to achieve stunning 3D results, detailing How It Works, Pros and Cons, Examples, Applications, and Recommended Software for each technique.
1. Parallax Animation with Photoshop and After Effects
Parallax animation involves separating a 2D image into different layers and moving these layers at varying speeds to create a sense of depth. This technique mimics the way objects appear to move slower in the distance and faster in the foreground, creating a realistic 3D effect.
How It Works:
- Layer Separation: Start by selecting an image and dividing it into separate layers in Photoshop. For example, a cityscape photo can have distinct layers for buildings, sky, and foreground objects like trees or people.
- Export and Animate: Import these layers into After Effects. Arrange them in a 3D space where each layer is placed at a different depth. Animate a camera to move across this 3D environment, creating a parallax effect.
- Depth Creation: The key is to animate each layer so that foreground elements move faster than background elements. This technique tricks the eye into perceiving depth.
Pros and Cons:
- Pros:
- Allows for a high level of customization, enabling you to create a unique animation style.
- Creates a realistic and dynamic effect that can captivate viewers.
- Versatile for various media, from social media content to professional presentations.
- Cons:
- Requires experience in using Photoshop and After Effects, which might have a steep learning curve.
- Time-consuming and requires careful planning and execution.
Example: An animated cityscape with moving clouds and shifting buildings that provide a dynamic sense of depth and movement.
Application: Ideal for creating dynamic social media videos, website banners, and promotional materials where depth and realism are needed to grab attention.
Recommended Software: Adobe Photoshop and Adobe After Effects.
2. Cinemagraphs with 3D Enhancements
Cinemagraphs combine still photographs with subtle video loops to create a mesmerizing effect that draws the viewer’s attention to specific parts of an image. When you animate an image and make it 3D, you can add even more depth and impact to these captivating visuals.
How It Works:
- Video Capture: Capture a short video sequence where only a part of the scene is moving, such as flowing water or blowing leaves, while the rest remains still.
- Masking and Animation: Use software like Adobe After Effects or Flixel to mask the static areas and animate the moving parts. Enhance the animation by adding 3D elements like particles or layered textures.
- Final Touches: Refine the animation to ensure that the transition between the moving and static parts is smooth and natural.
Pros and Cons:
- Pros:
- Combines the stillness of a photo with the dynamic motion of a video, creating eye-catching visuals.
- Engages viewers by highlighting motion in a subtle yet powerful way.
- Simpler to create than full 3D animations.
- Cons:
- Limited to small, subtle movements.
- Requires precision to achieve a smooth effect without visible seams.
Example: A cinemagraph of a street scene where only the leaves on a tree gently sway, while everything else remains motionless, enhanced with a 3D depth effect.
Application: Excellent for social media ads, website headers, and other digital content where a mix of static and dynamic visuals can enhance viewer engagement.
Recommended Software: Flixel, Adobe After Effects.
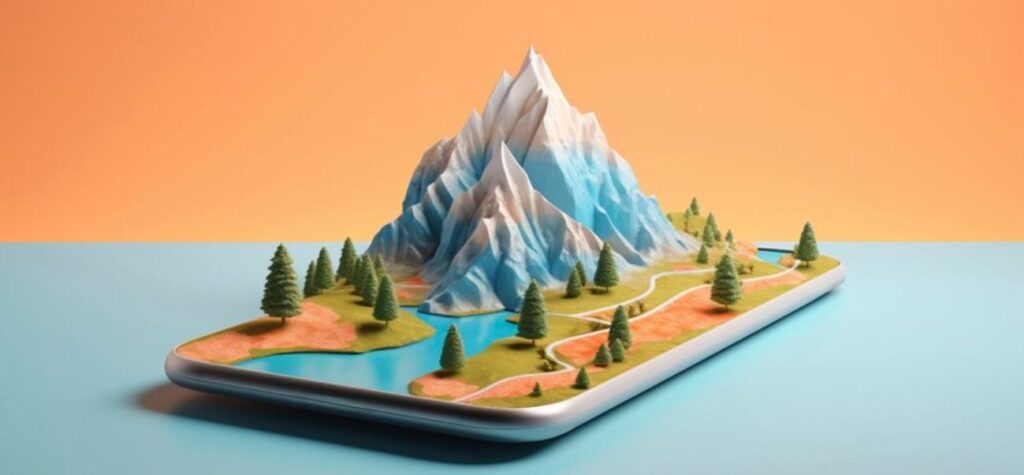
3. 2.5D Animation in After Effects
2.5D animation involves creating a 3D-like effect by manipulating 2D images in a 3D environment. This technique allows you to add depth and dimension without fully transitioning into complex 3D modeling.
How It Works:
- Layer Import: Import a 2D image into After Effects and break it into multiple layers based on depth, such as foreground, midground, and background elements.
- 3D Space Setup: Convert these layers into 3D layers and position them in a 3D environment within After Effects.
- Camera Animation: Animate a virtual camera to move through this space, making the image appear to have depth and dimension.
Pros and Cons:
- Pros:
- Creates the illusion of 3D using only 2D images, saving time and resources.
- Easier to set up compared to full 3D modeling.
- Effective for adding depth to flat images, making them more dynamic.
- Cons:
- Limited to a 2.5D effect, lacking the full depth of true 3D animations.
- Requires fine-tuning to avoid unrealistic effects.
Example: An animated travel poster where different layers, like mountains, trees, and sky, move at different speeds to create a sense of depth.
Application: Great for explainer videos, presentation slides, and interactive web content where a semi-3D effect enhances the viewer’s experience.
Recommended Software: Adobe After Effects.
4. Full 3D Animation with Blender
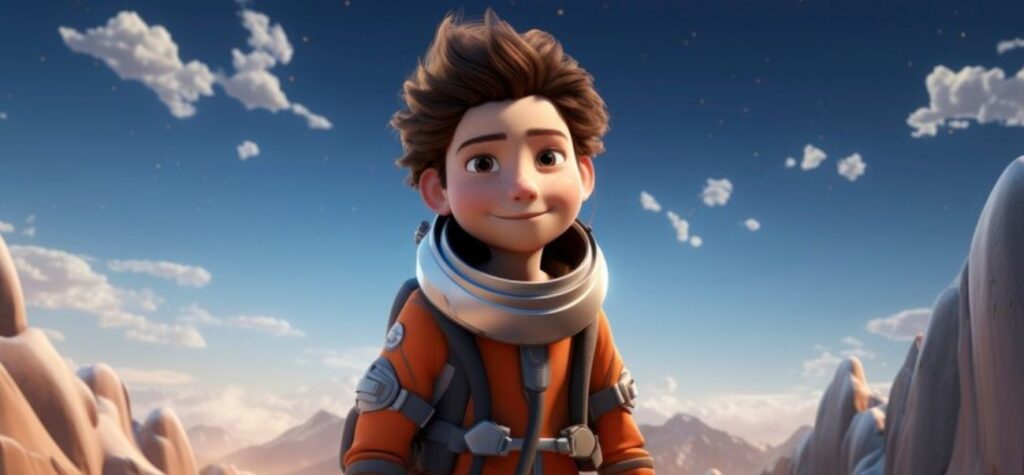
Blender is a powerful open-source software that allows you to create detailed 3D animations from scratch. It gives you complete creative control, making it perfect when you want to animate an image make 3D for complex and professional-quality animations.
How It Works:
- Image Import: Start by importing 2D images into Blender. These images can be used as references or textures for creating 3D models.
- Modeling and Texturing: Use Blender’s robust modeling tools to create 3D objects from scratch. Apply textures derived from the imported images to these models to add realism.
- Animation and Rendering: Once the 3D models are ready, animate them using Blender’s animation tools. Use lighting and camera effects to enhance the scene and render the final output.
Pros and Cons:
- Pros:
- Provides a high level of detail and realism.
- Free to use and supported by a large online community.
- Suitable for complex and professional-grade animations.
- Cons:
- Steep learning curve; requires knowledge of 3D modeling and animation.
- Time-consuming to master and implement.
Example: A fully animated 3D character or object created from a 2D concept art, complete with realistic textures, lighting, and movement.
Application: Ideal for game development, movies, and detailed 3D visualizations where realism and complexity are required.
Recommended Software:Blender.
5. Morphing Effects with Adobe Animate
Morphing involves transforming one image or shape into another through smooth transitions, which can be further enhanced with 3D effects for more dynamic visuals.
How It Works:
- Vector Creation: Begin by designing vector shapes in Adobe Animate that represent different states of the image.
- Keyframing: Create keyframes to smoothly animate the transitions between these shapes. Apply 3D effects to these transformations to give them more depth.
- Smooth Transitions: Refine the transitions to ensure they are fluid and cohesive, adding 3D effects where needed for an added layer of complexity.
Pros and Cons:
- Pros:
- Creates smooth and dynamic animations.
- Good for enhancing visual storytelling.
- Easier to use compared to complex 3D modeling software.
- Cons:
- Limited to vector-based content.
- Requires detailed keyframing for realistic effects.
Example: A logo or icon morphing into another shape or object with a smooth transition, combined with 3D effects for depth.
Application: Great for logo animations, UI/UX transitions, and educational content where a dynamic and engaging approach is needed.
Recommended Software: Adobe Animate.
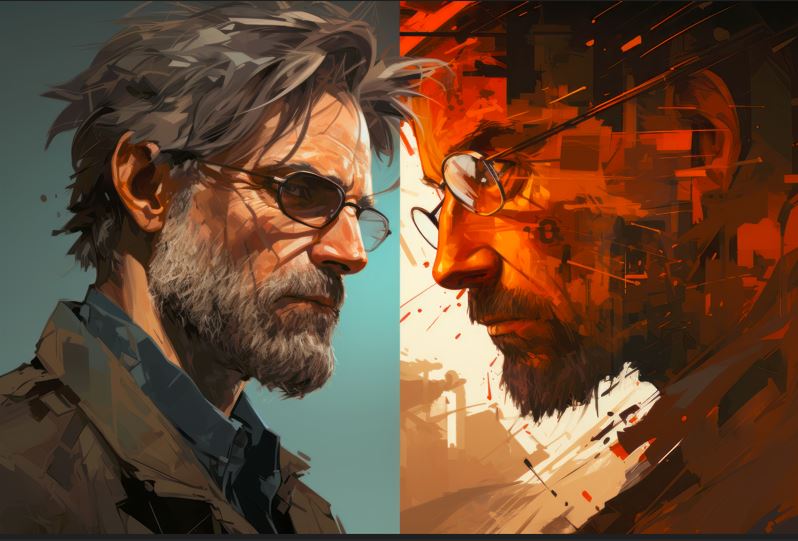
6. Depth Maps in After Effects
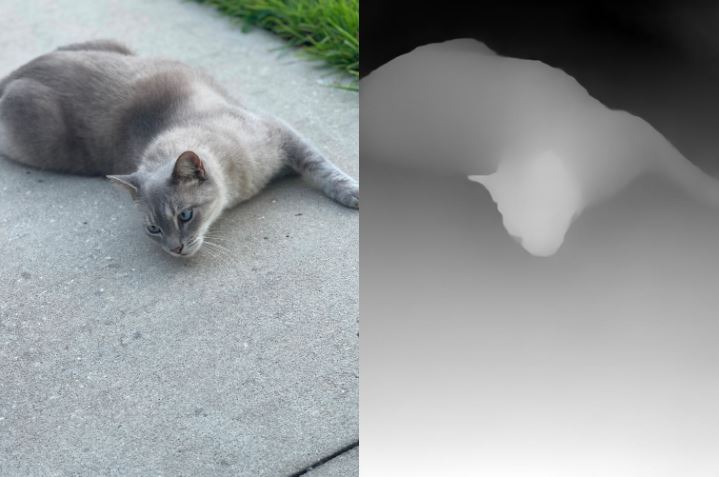
Depth maps use grayscale values to simulate depth in a 2D image, providing a pseudo-3D effect. This technique is ideal for creating subtle 3D illusions in flat images.
How It Works:
- Depth Map Creation: Use a grayscale image where lighter areas are closer to the camera and darker areas are further away.
- Import and Animate: Import both the original image and the depth map into After Effects. Use them to manipulate the image in 3D space, adjusting the camera angle to create depth.
- Enhancement: Adjust perspective, depth of field, and lighting to enhance the 3D illusion.
Pros and Cons:
- Pros:
- Simple and effective way to add depth.
- Works well with existing images.
- Enhances visual interest with minimal effort.
- Cons:
- Effectiveness depends on the quality of the depth map.
- Limited control over the final look.
Example: A portrait where the subject appears to pop out from the background, creating a more engaging visual.
Application: Ideal for photo galleries, documentaries, and creative storytelling projects.
Recommended Software: Adobe After Effects.
7. Mobile Apps for 3D Photo Effects
Mobile apps offer a quick and easy way to apply 3D effects to images, using AI technology to deliver instant results. These apps are perfect for those looking to animate an image make 3D without needing advanced software or skills.
How It Works:
- Photo Selection: Choose a standard photo to convert into 3D using a mobile app.
- AI Processing: The app uses AI algorithms to analyze the photo and generate a 3D effect, such as depth or movement.
- Customization: Adjust settings such as depth intensity or animation speed to fine-tune the effect.
Pros and Cons:
- Pros:
- Quick and easy to use.
- No need for advanced software or skills.
- Great for social media content creation.
- Cons:
- Limited customization options.
- Output quality depends on the app.
Example: A portrait photo transformed into a 3D effect with depth and movement using a mobile app.
Application: Perfect for casual users and social media enthusiasts looking to create engaging content on the go.
Recommended Software: LucidPix, Phogy.
8. CSS 3D Transformations for Web
3D Box 13D Box 1
3D Box 23D Box 2
3D Box 33D Box 3
CSS 3D transformations allow you to create 3D effects directly on web elements using HTML and CSS. This method is ideal for adding interactive depth to web pages.
How It Works:
- HTML Structure: Define the HTML structure for the elements you want to transform.
- CSS Styling: Apply CSS properties like
transformandperspectiveto rotate, scale, and position elements in a 3D space. - Interactivity: Add hover or click effects to make the 3D transformations interactive.
Pros and Cons:
- Pros:
- Lightweight and efficient for web use.
- Easy to implement with basic HTML and CSS knowledge.
- Enhances user experience with interactive elements.
- Cons:
- Limited to simple 3D effects.
- Not suitable for complex animations.
Example: A 3D card flip effect on a product image when a user hovers over it on a website.
Application: Ideal for interactive web design, e-commerce sites, and portfolios where engaging user experience is a priority.
Recommended Software: Any code editor like VS Code or Sublime Text.
9. 3D Rendering in Adobe Dimension
Adobe Dimension allows you to import 2D images and place them onto 3D models for realistic visual effects.
How It Works:
- Image Application: Start by importing a 2D image and applying it to a 3D model, such as a box or sphere, in Adobe Dimension. This software allows you to “Animate an Image Make 3D” by transforming flat images into visually stunning 3D compositions, ideal for creating engaging product mockups or marketing visuals.
- Material and Lighting Adjustments: Adjust the texture, lighting, and camera angles to enhance the 3D look. Fine-tuning these elements can significantly elevate the realism of your 3D design.
- Rendering: Render the final image with photorealistic effects, such as reflections and shadows, to bring the 3D scene to life. Adobe Dimension’s rendering capabilities make it easy to achieve high-quality, professional results.
Pros and Cons:
- Pros:
- Easy to learn and use.
- Quick rendering of 3D models.
- Produces photorealistic results.
- Cons:
- Limited to rendering, not full animation.
- Fewer features than advanced 3D software.
Example: A product mockup where a 2D logo is applied to a 3D model.
Application: Ideal for product visualizations and marketing materials.
Recommended Software: Adobe Dimension.
10. 3D Filters on Social Media
Social media platforms offer built-in 3D filters for quick and engaging photo enhancements.
How It Works:
- Filter Application: Platforms like Instagram or Snapchat provide pre-designed 3D filters that help users animate an image make 3D in just a few taps. These filters can add depth and dynamic elements to photos, making them more visually engaging.
- Customization: Adjust the filter intensity and style to match your preferences. This allows users to tailor their images while maintaining the 3D effects.
- Sharing: Use the enhanced photo for posts or stories to captivate your audience with unique, eye-catching visuals.
Pros and Cons:
Pros:
- Easy and quick to use.
- No need for specialized software.
- Includes interactive effects.
Cons:
- Limited customization.
- Effectiveness varies by filter design.
Example: A photo with a 3D filter that adds dynamic elements or depth effects, demonstrating how to animate an image make 3D for social media engagement.
Application: Perfect for quick social media enhancements and content creation where a 3D effect can make content stand out.
Recommended Software: Instagram, Snapchat
11. Animated GIFs with 3D Effects
Animated GIFs can be enhanced with 3D effects to create dynamic visuals.
How It Works:
- Frame Creation: Design a series of frames with 3D effects using graphic software.
- GIF Animation: Use a GIF creation tool to animate these frames in a loop.
- Optimization: Ensure the GIF is optimized for web use to maintain quality and reduce file size.
Pros and Cons:
- Pros:
- Easy to share and embed.
- Attention-grabbing and engaging.
- Simple to create and edit.
- Cons:
- Limited to looping animations.
- File size can be large if not optimized.
Example: A rotating 2D graphic with a 3D perspective effect.
Application: Ideal for web banners, social media, and email marketing.
Recommended Software: Adobe Photoshop, GIF Maker tools.
12. AI-Powered 3D Image Conversion
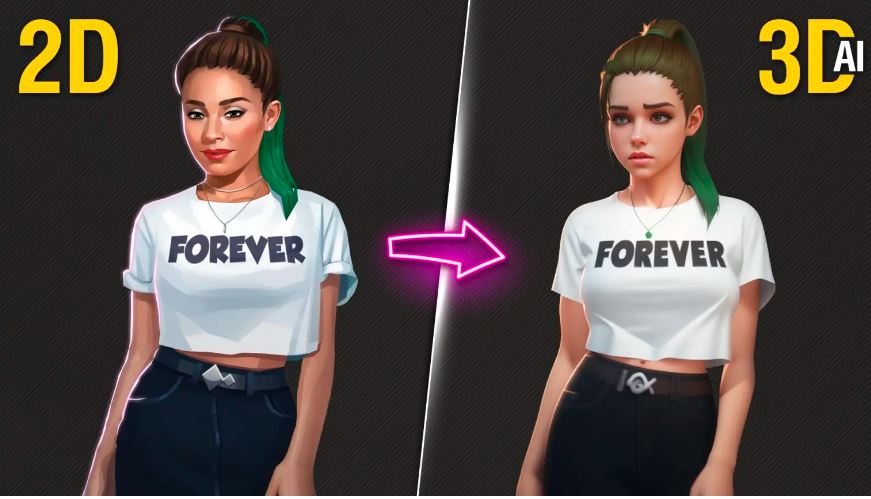
AI tools automate the process of converting 2D images into 3D models with depth and realism.
How It Works:
- Image Upload: Start by uploading a 2D image to an AI-powered conversion tool. This initial step sets the foundation for the 3D transformation.
- 3D Model Generation: The AI analyzes the image and creates a 3D model with simulated depth and realistic effects, enhancing the visual appeal of the content.
- Refinement: To animate an image make 3D effectively, make additional adjustments to perfect the 3D effect. This allows users to fine-tune details, add more depth, and achieve the desired level of realism.
Pros and Cons:
Pros:
- Fast and automated.
- Quick creation of 3D models from 2D images.
- Reduces manual effort.
Cons:
- Quality depends on the AI tool.
- May require further adjustments.
Example: A photo converted into a 3D model that can be viewed from different angles.
Application: Ideal for scenarios where you need to animate an image make 3D, such as rapid 3D modeling and virtual reality content creation. These tools simplify the process, making it accessible even to those without advanced 3D design skills.
Recommended Software: Depthy, 3Dthis
Conclusion
Learning how to animate an image make 3D can transform ordinary visuals into captivating and engaging content. With the right tools—whether basic or advanced—you can easily add depth, movement, and life to your images. This guide provides twelve effective methods to help you animate images and create stunning 3D effects, suited to your needs and skill level. By exploring these techniques, you can elevate your visual storytelling and keep your audience engaged like never before. Start experimenting today and watch your images come to life in 3D!
Frequently Asked Questions (FAQs)
What does it mean to animate an image and make it 3D?
Animating an image and making it 3D means adding depth and motion to a flat, 2D image. This process involves using software tools to create visual effects that give the illusion of a three-dimensional space, making the image more dynamic and engaging.
How can I animate an image and make it 3D without coding?
Most animation software like After Effects, Blender, and Photoshop offer drag-and-drop interfaces, pre-set effects, and templates that allow you to animate images and create 3D effects without any coding.
Can I animate an image and make it 3D for free?
Yes, there are free tools like Blender and GIMP that allow you to animate images and create 3D effects. These tools are powerful and widely used by professionals but may have a learning curve.
What skills do I need to animate an image and make it 3D?
To animate an image make 3D, start by learning essential design principles, using powerful animation software, and developing basic 3D modeling skills. As you advance, understanding scripting and animation physics can help you bring your 3D creations to life with more detail and realism. By mastering these techniques, you’ll be ready to animate an image make 3D and create stunning visuals that captivate your audience.
What file formats are best for 3D animations?
Common file formats for 3D animations include MP4, GIF, MOV, and WEBM. These formats are widely supported and suitable for sharing across various platforms.