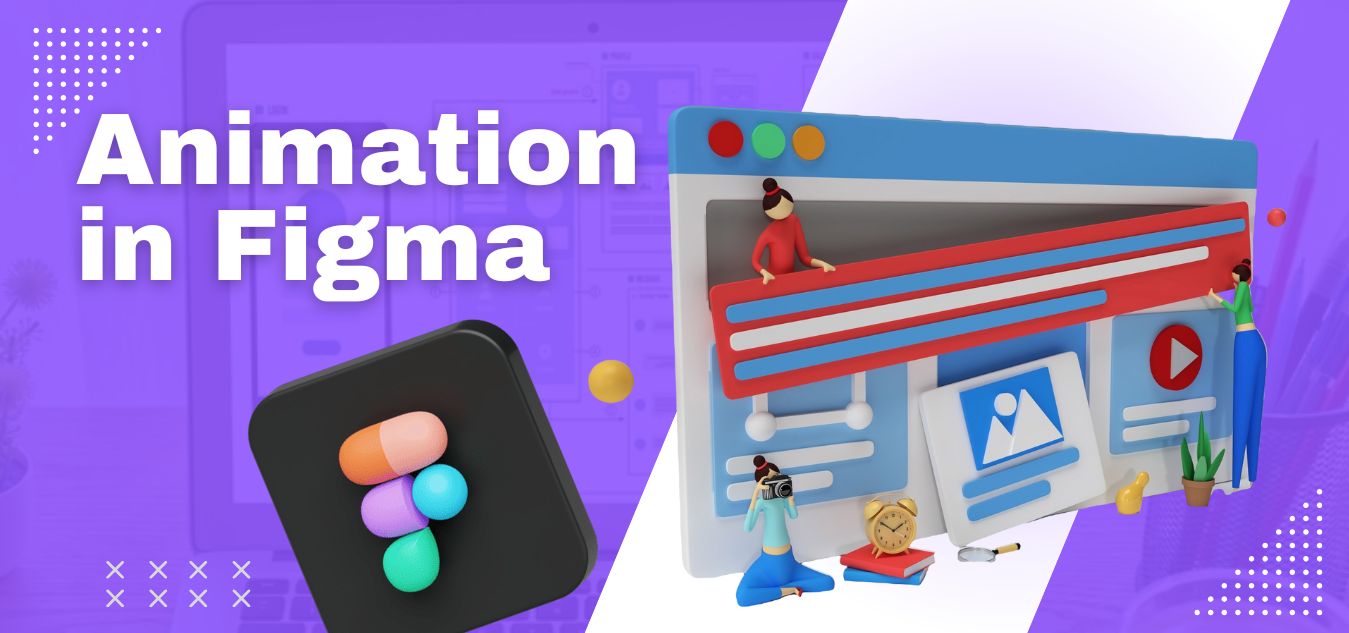
How to Animate in Figma | Simple Guide
Introduction
In todays era, we are more toward animations then static website designs. Animation attracts more users and grab more attention. Of course animation in Figma is trending and makes user experience more better. In this article we are going to talk about how to animate in figma through simple guide. If you are a good UI designer and want to have better user experience also, you need to learn how you can animate in figma.
Static UI Design VS Animation
Static UI designs are good but animation gives your UI design more life. For example if you are going to design a mobile app with some cool products show case and you want to make your app alive through some cool animations of products changing with prices. You definitely need to know how to animate in figma. Or simply you need to show developers how you have imagined of your app to work. Have you think of making cool loader animations?
Animation in Figma
These are all so easy and simple if you know how to animate in figma. So lets start with it.
In figma you have to design first for animation so lets take a desktop screen and design something cool.


We are done with the design so now we can animate both screens as a slider or we can also animate each screen with own elements. Lets start with the figma animation tools overview first.
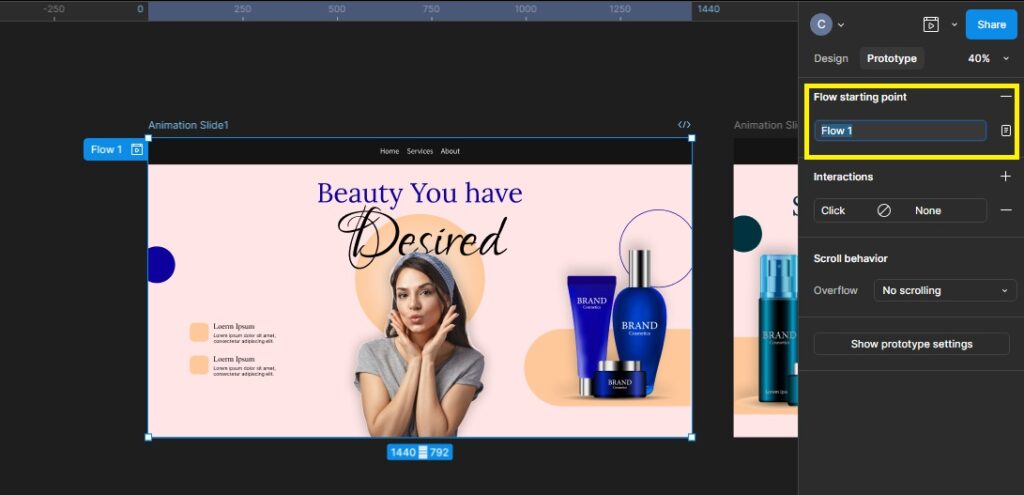
I have selected the first screen frame and named it as Animation Slide1. Now if we go to prototype tab while selecting the respective frame, we can see small circle icon with plus sign. This sign indicates that you can start animation from here or you can link/prototype this frame to another.

Prototype Tools Overview
You can see in the prototype panel we have multiple options to animate.
1. Flow starting point indicate the starting point of animation. You can add the frame here from which you want to start the animation.
2. In the Interactions and Action option you can choose how our animation would work. You can see the list of Interaction options.
- Navigate to will navigate this frame to another.
- Back will back the frame.
- Scroll to will show scroll animation.
- Open link will open up the link.
- Open overlay will open overlay on respective frame.
- Swap overlay will show swap animation of overlay frame.
- Close overlay will close the respective frame overlay.
- Set Variable will set that frame as a variable animation.
- Set Variable mode will identify the variable animation state, for example if we are going to change the color for variable.
- Conditional interaction can help you make logics/conditions for the animation.
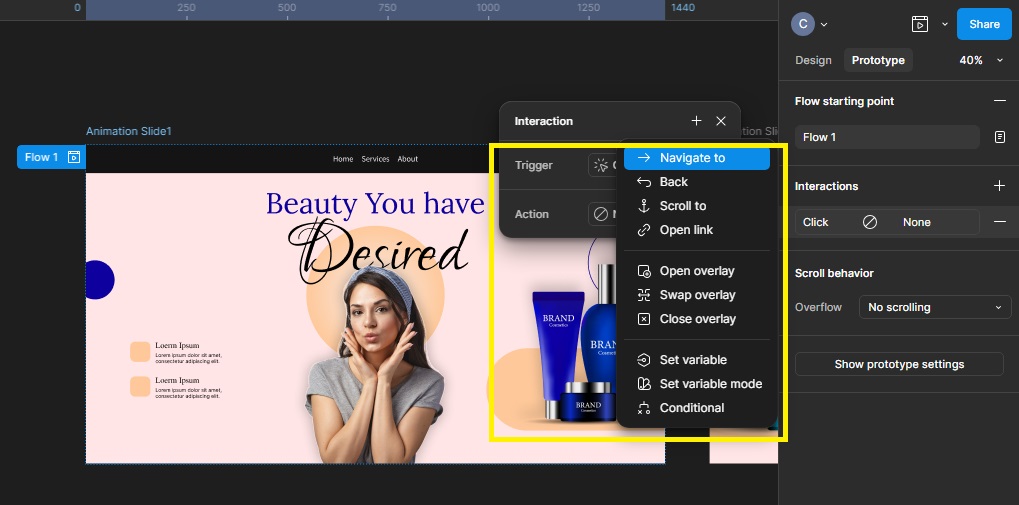
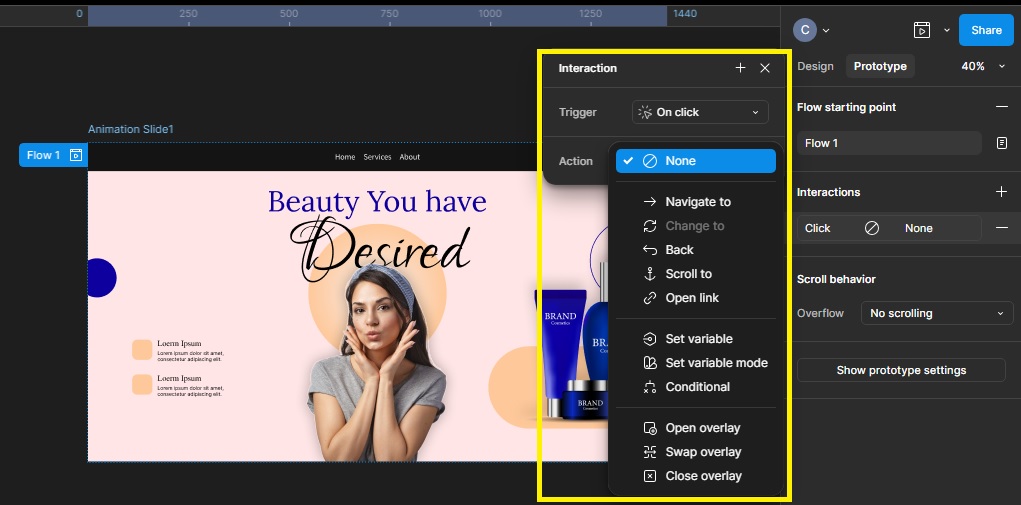
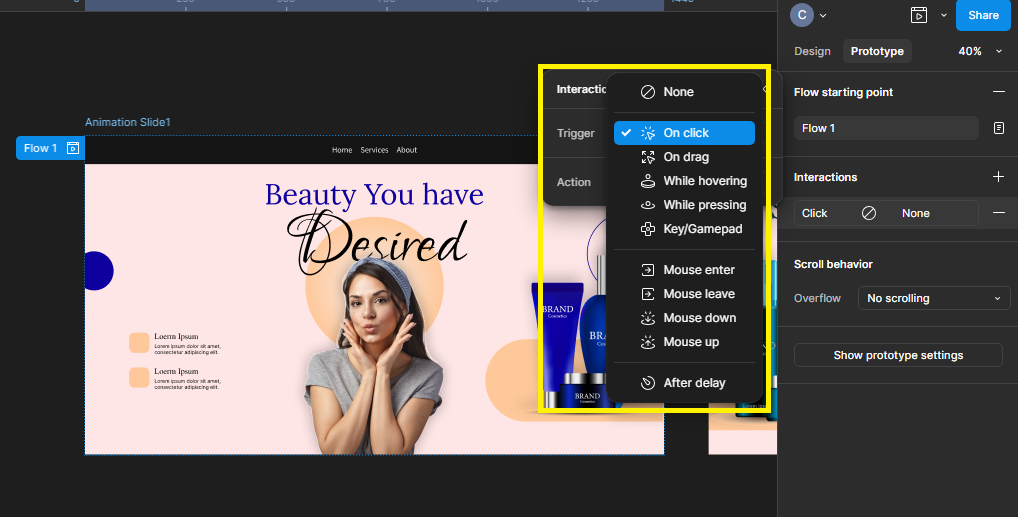
In Interaction we have two tabs of Trigger and Action options.
3.Trigger dropdown list shows how animation will play.
- On click offers animation on mouse click.
- On drag animation can be happen while dragging the mouse.
- While hovering shows animation while hovering on the respective frame.
- Key/Gamepad animation works on specific key.
- Mouse enter animation works while entering mouse on screen.
- Mouse leave animation will play when mouse leave the screen.
- Mouse down will work when we down the mouse.
- Mouse up will effects the animation to play when we move up the mouse on screen.
- The last one is After delay. It makes the animation to play after delay of some time. We can set the time according to our requirements.
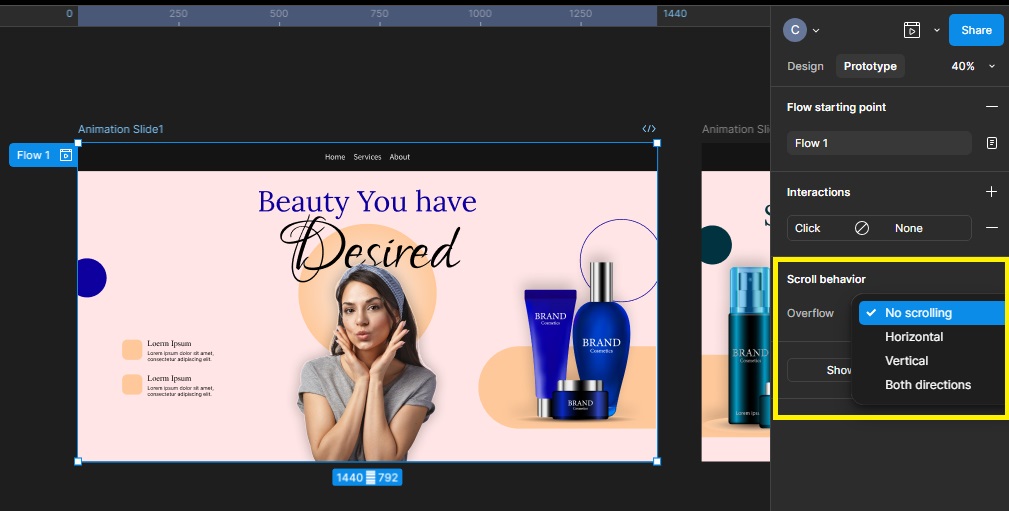
4.Scroll Behavior shows options for how scrolling will work in animation.
- No scrolling means the frame will be static with no scroll animation.
- Horizontal means we can scroll the frame horizontally.
- Vertical ensures the scrolling of frame will occur vertically.
- Both direction scroll behavior occurs in both horizontal and vertical directions.
So that’s all for the figma prototype animation tools overview. Now lets move to the simple guide on how to animate in Figma.
Slider Animation
I am going to start with the basics so lets make simple slide animation.
Select Animation slide1. Click on the plus icon and drag drop to Animation slide2. You can now see interaction tab opened.
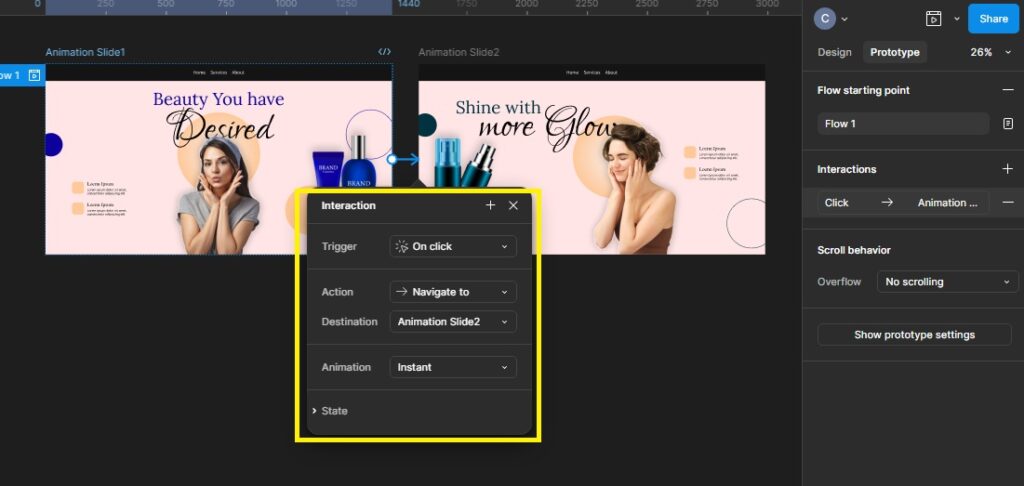
Here you can see we have Trigger option automatically selected of “On click”. Action of “navigate to” and Destination to “Animation Slide2” and Animation mode as “Instant”.
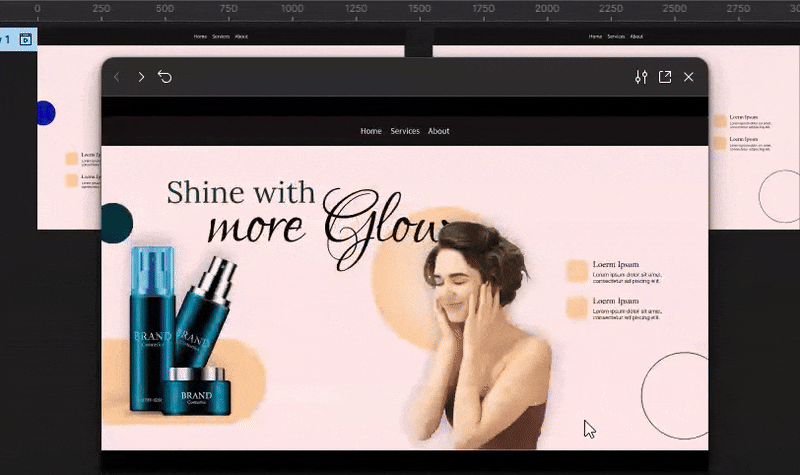
Now lets change the trigger option to “After delay of 1000ms” and animation style to “smart animate with ease in”. The duration of animation will be “300ms”. Also slide back by making same interaction animation from Animation Slide2 to Animation Slide1.

here you have the results.
Final Thoughts
In this article I have explained figma tools for animation and how to animate in figma. I have showed you simple slider animation. There is much more to animate and much more to explore in figma animation. You can make your UI design dynamic and interactive with some cool animations. You can start with the simple basic example which I have showed you. Stay connected to learn more from basic to advanced.